In this continuing drought, the dry season is not the best time to plant, but you can if you do it the right way. At the recent Going Native Garden Tour, I visited two gardeners in San Jose who have successfully planted dozens of natives in any season.
Before you plant, ensure good drainage for your drought-tolerant plants by choosing a planting site either on a slope, or on a berm at least a foot higher than the surrounding soil.
Plants that come from the nursery in containers are typically grown in a soilless medium that helps roots grow and speeds drainage. But in the ground, the typical clay-rich soil holds moisture well and drains slowly. If the plant were simply transferred from the container to the ground, the surrounding clay soil would act like a container. Landscape contractor Alan Hackler said when planted this way, plants may die or fail to thrive because the roots never venture beyond the original rootball.
The best time to plant natives is from about October to January, when you can (in normal years) count on winter rains to help get the roots established. But if you are planting now, in the dry season, it's especially important to make sure the soil around the planting hole is well hydrated and that the roots can make their way into this soil. If the surrounding soil is dry, it can wick water away from the plant. Instead, you want to encourage the plant's roots to grow toward moist soil. With sufficiently moist soil, the plant will more readily adapt to its new environment and grow faster.
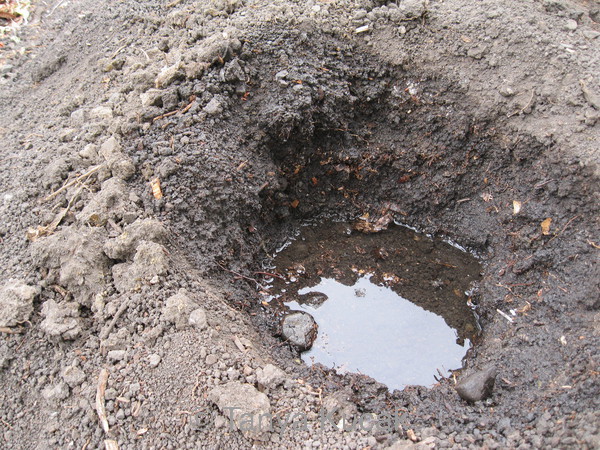
To help the plants adapt to the drastic change in drainage and soil texture, the first step is to dig a hole no larger than the container. Put the removed clay soil in a pail. Fill the hole with water two or three times, and wait for it to drain each time.
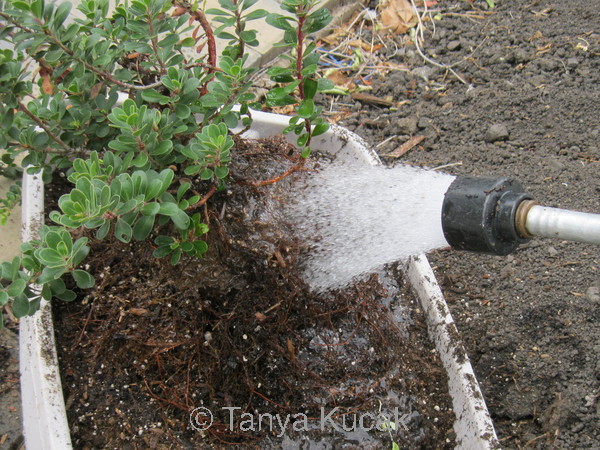
Next, rinse the soilless mix off the root ball and add it to the pail. Remove at least the top inch or two of soilless mix from the rootball and an inch or so around the outside. Spread the roots out if you can.
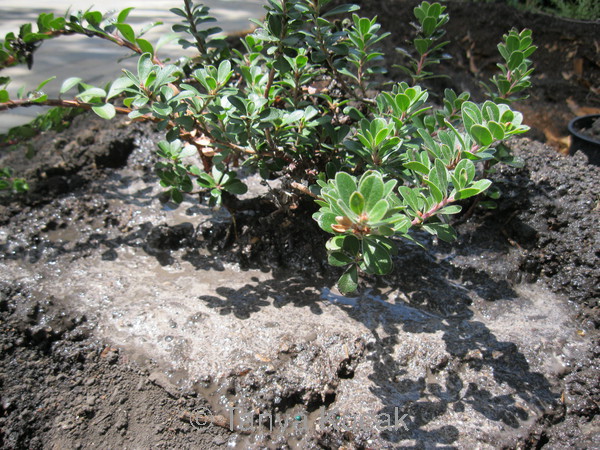
Make a slurry in the pail with the rinsed-off soilless mix, the clay soil, and not too much water. Put the plant in the planting hole, with the root crown a bit above the level of the surrounding soil, and add the slurry of clay soil and soilless mix to the hole. Kris Kozminski calls this technique “planting in mud.”
Kozminski has successfully planted many natives using this method, including plants such as manzanita and fremontodendon that have a reputation for resenting root disturbance. Hackler, too, has been successful with all types of native plants. Integrating the roots with the surrounding soil enables plants to become established in about a year, in most cases.
Once the plant is in the ground, it's crucial to add at least 2 to 4 inches of wood-chip mulch. Keep the mulch a few inches away from the crown of the plant. The mulch will help hold moisture in the soil for a surprisingly long time and maintain soil health.

To ensure that the roots of your plant will grow out into the soil, fill the planting hole with water three times. The water will be absorbed into the surrounding soil, which will stay moist for a long time if it is sufficiently mulched.

Once you have combined the slurry of clay soil and soilless mix, place the plant in the hole and wiggle it around to fill the air spaces as you add the slurry around the plant. Finish by adding 2-4 inches of mulch around the plant, pulling the mulch away from the root crown.

Wash the soilless mix off the rootball into the same container in which you have placed the clay soil from the planting hole. Remove at least an inch from the top and sides of the plant.
© 2015 Tanya Kucak