PrevIndexNext
Drawing with Perl/Tk
use Tk;
my $mw = MainWindow->new(
-title => "Draw",
);
my $canvas = $mw->Canvas(
-height => 300,
-width => 400,
-background => "white",
)->pack;
$canvas->createLine(0, 0, 100, 150,
-fill => "red",
-width => 2,
);
MainLoop;
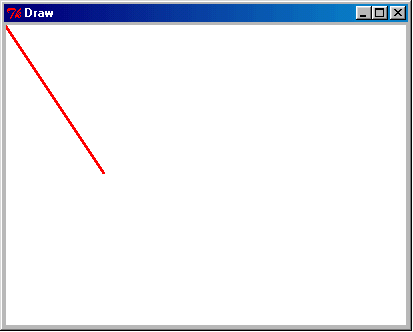
The above code creates a 300x400 white canvas and draws
a red line of width 2 on it. The coordinate system
is a little backwards - with (0, 0) at the upper left.
This is what it looks like:
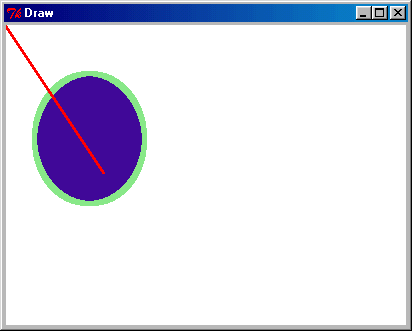
Let's add an oval behind the line. Changes are in green.
use Tk;
my $mw = MainWindow->new(
-title => "Draw",
);
my $canvas = $mw->Canvas(
-height => 300,
-width => 400,
-background => "white",
)->pack;
$oval = $canvas->createOval(30, 50, 140, 180,
-fill => "#4510a3", # RGB hex values
-outline => "lightgreen",
-width => 5,
);
$canvas->createLine(0, 0, 100, 150,
-fill => "red",
-width => 2,
);
MainLoop;
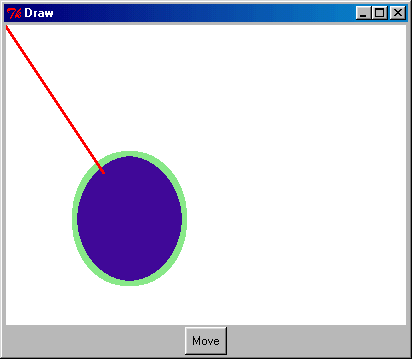
As a final demonstration let's add a button that when
pressed will cause the oval to move!
use Tk;
my $mw = MainWindow->new(
-title => "Draw",
);
my $canvas = $mw->Canvas(
-height => 300,
-width => 400,
-background => "white",
)->pack;
my $oval = $canvas->createOval(30, 50, 140, 180,
-fill => "#4510a3",
-outline => "lightgreen",
-width => 5,
);
$canvas->createLine(0, 0, 100, 150,
-fill => "red",
-width => 2,
);
$mw->Button(
-text => "Move",
-command => sub {
$canvas->move($oval, 40, 80);
},
)->pack;
MainLoop;
This is what the screen will look like after pressing the button:
Do you sense the possiblities? Play! Try it!
The canvas widget is one of the most sophisticated of them all.
Very useful for all kinds of things.
And fun!
PrevIndexNext